
Group devices and assign policies
Before you start
- You need the
operatororadminrole. - You need stable client addresses or a client subnet.
- Use DHCP reservations for individual devices with address matchers.
Create a client group
- Open Filtering > Groups.
- Click New group.
- Enter a Name on Name.
- Click Next to open Members.
- Click Add matcher.
- Select IP address for one device or CIDR range for a subnet.
- Enter the device address or network prefix.
- Click Next to open Policies.
- Select the policies that apply to these clients.
- Click Next to open Review.
- Click Create group.
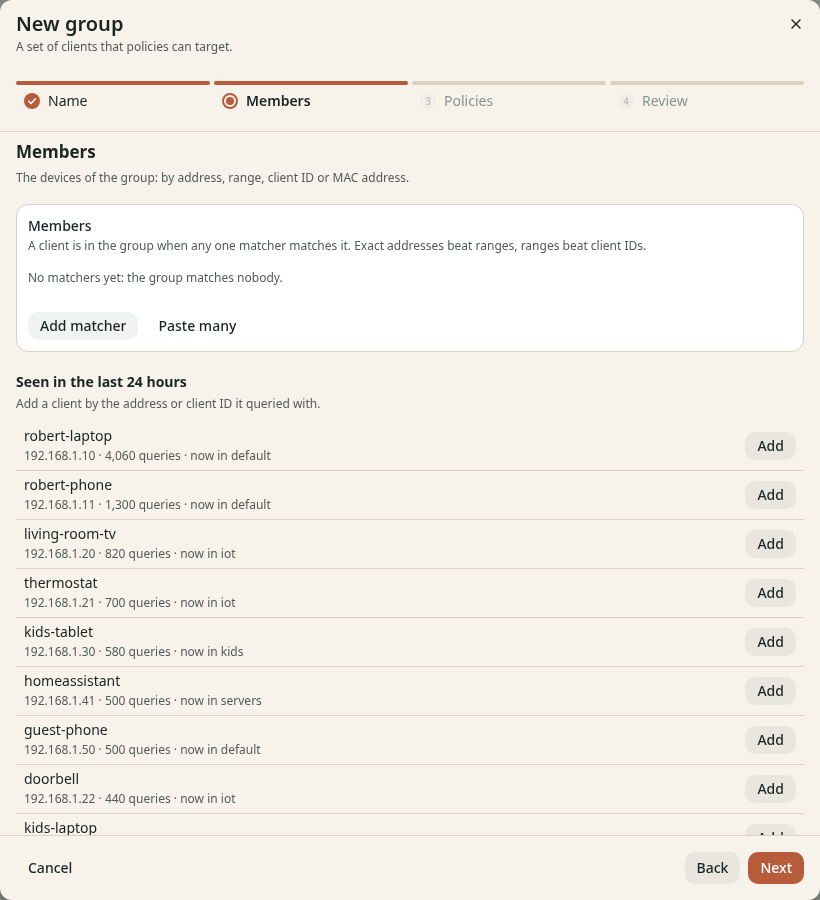
Figure 1. Use an IP address or CIDR range for device matching.
You can click Add beside a recently seen client instead of entering its address.
The DNS listeners in v0.1.0 do not receive client IDs or MAC addresses.
Use IP or CIDR matchers. Clients with no matching group use default.
Change membership
- Open Filtering > Groups.
- Click Open for the group.
- Click Edit in Members.
- Change the matchers.
- Save the changes.
The detail page lists observed clients and policies that apply. Disable stops the group from matching; affected clients can fall into another group. File-managed and Kubernetes-managed groups need edits at their source.
Check the result
Generate a query from the device, then open its client details. Confirm the expected Groups and Policy right now. If every client appears as the router, give clients the kudurru DNS address directly.