
Manage a zone and its records
Before you start
- You need permission to read the zone.
- You need the
admin,operatoror scopedzone-adminrole to edit its records. - Use Create a local DNS name if you need a new primary zone.
Find and edit a record
- Open DNS > Zones.
- Click the zone name.
- Enter a name, type or value in Filter records.
- Click Edit in the record's row.
- Change the target or TTL.
- Save the record.
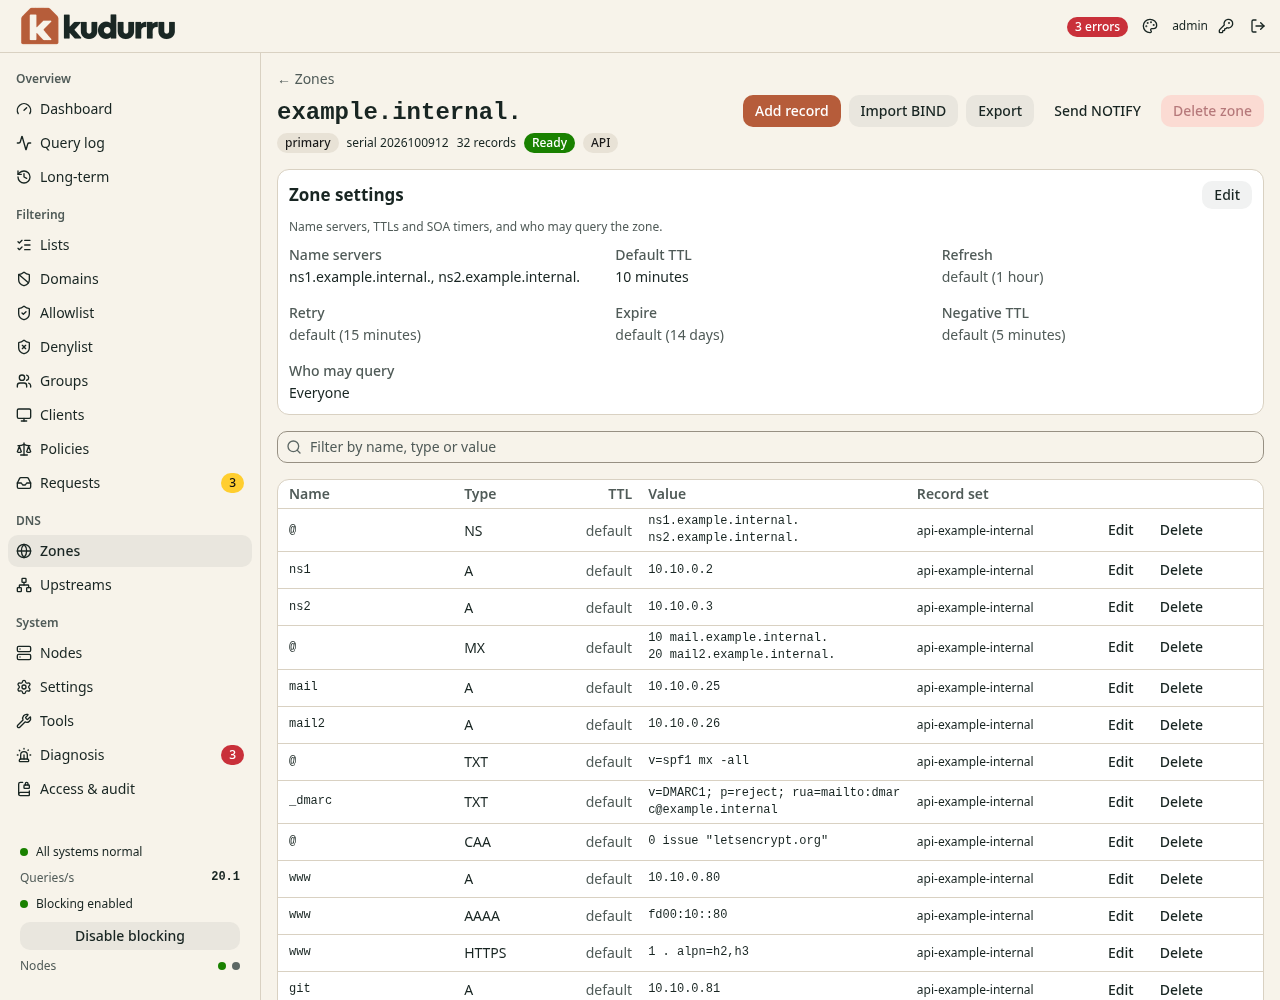
Figure 1. Record edits belong to the primary zone that stores them.
Use Add record to create another name or type. Use Add target in the editor for another value in the same record. Disabled keeps the record but removes it from DNS answers. Secondary, forward and stub zone records come from elsewhere and are read-only. For a managed zone, edit its file or Kubernetes resource.
Import or export a zone
- Click Export to inspect the current BIND zone file.
- Click Download to keep a copy before changes.
- Close the export dialog.
- Click Import BIND.
- Select a Zone file or paste the zone text.
- Click Import.
- Read the result and any warnings.
Import zone file on Zones creates a zone from a BIND file. Send NOTIFY tells configured secondary servers to fetch updates and needs transfer permission. Use the forward zone procedure when a domain needs a particular upstream instead of local records.
Check the result
Query the edited name from a client that uses kudurru. Confirm its value and authoritative source in Query log. Inspect the record table after an import before you depend on the new answers.