
Create a DHCP scope
Before you start
- You need the
adminrole on the node that assigns addresses. - You need the values from Prepare your network.
- You need a fresh scope setup that the dashboard can manage.
This page is for direct clients on a Linux node with SQLite. For Kubernetes, use Create a scope with a trusted relay.
If the page says Managed by the configuration file, follow Adopt existing setup first.
Describe the subnet
- Open DNS > DHCP on the node that assigns addresses.
- Click New scope.
- Enter
lanin Scope name. - Select your Host interface.
- Enter its fixed IPv4 address in Server address.
- Enter the network prefix in Client subnet.
- Keep Relay-only scope off for clients on this local network.
- Keep Address conflict detection set to Automatic.
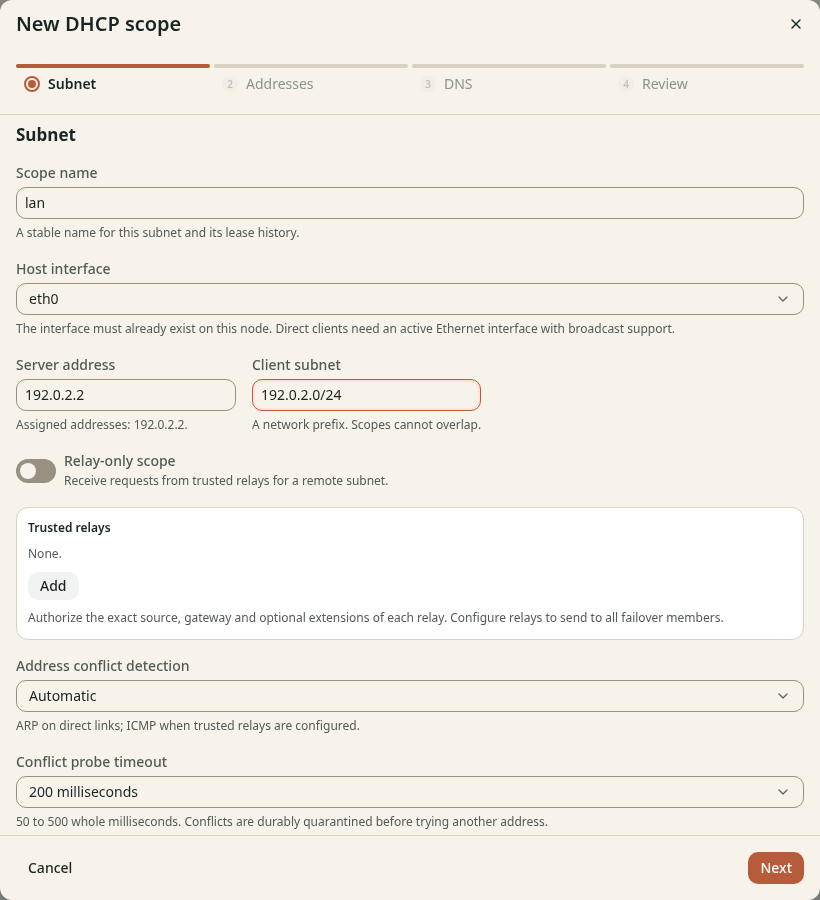
Figure 1. Select an existing host interface and address.
Leave Trusted relays and Failover server addresses empty for this single-node walkthrough.
Check the result
The Subnet step shows your planned interface, server address and network. Keep the wizard open and continue to Set the address pool.