
Set the Kubernetes scope address pool
Before you start
- You need the open New DHCP scope wizard with a trusted relay.
- You need your pool, gateway and DNS listener addresses.
Set client options
- Click Next to open Addresses.
- Enter
192.0.2.100in First address, or use your planned start. - Enter
192.0.2.199in Last address, or use your planned end. - Enter the client gateway in Router,
192.0.2.1in this example. - Click Add DNS server.
- Enter your DNS listener address in DNS servers 1,
192.0.2.2in this example. - Keep Lease duration at
12hfor this example.
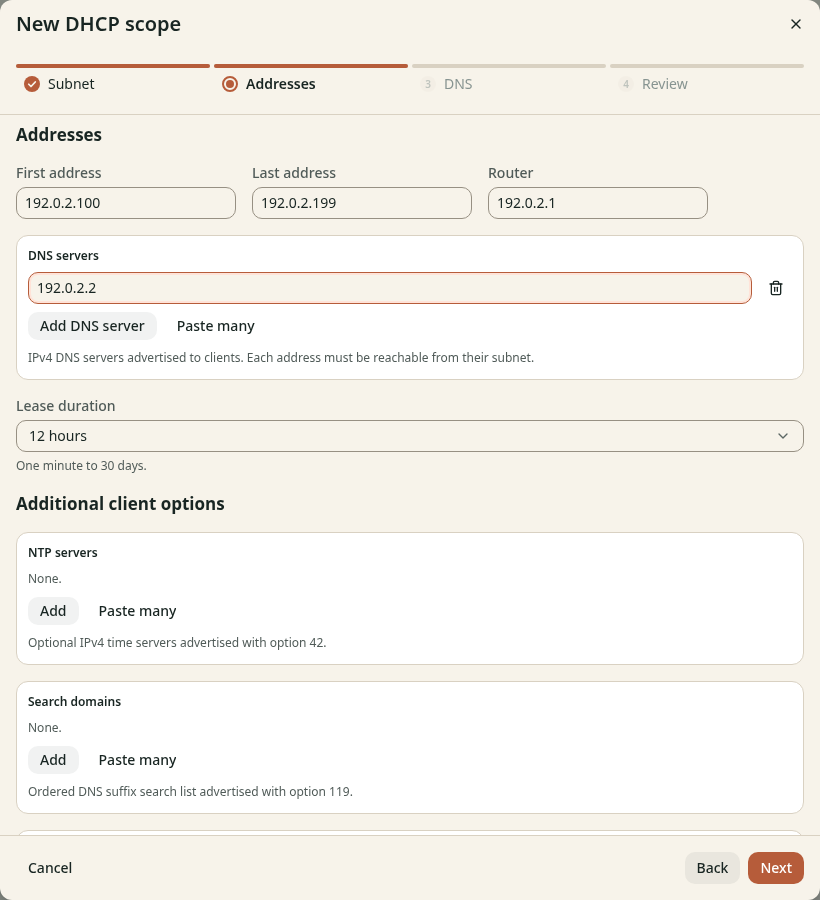
Figure 1. These values describe the client network, not the pod network.
The DHCP LoadBalancer address is not automatically a DNS server. Clients need the address of your DNS Service or DNS edge listener. Keep additional network and boot options at their defaults unless your network needs them.
Check the result
The pool fits the client subnet and excludes static addresses and unexpired old leases. The gateway and DNS listener are reachable from the client VLAN. Keep the wizard open and continue to Set lease DNS.