
Create a scope with a trusted relay
Before you start
- You need the
adminrole and the recorded relay values. - You need DHCP enabled through Helm.
- Keep client DHCP traffic away from kudurru until the cutover.
Describe the subnet
- Open DNS > DHCP.
- Click New scope.
- Enter
lanin Scope name. - Confirm that Relays send to shows your DHCP LoadBalancer address.
- Enter
192.0.2.0/24in Client subnet, or use your planned subnet. - Click Add under Trusted relays.
- Enter the recorded source in Relay source address.
- Enter the recorded
giaddrin Relay gateway address. - Enter
0in Relay source port for the normal UDP port67. - Keep Address conflict detection set to Automatic.
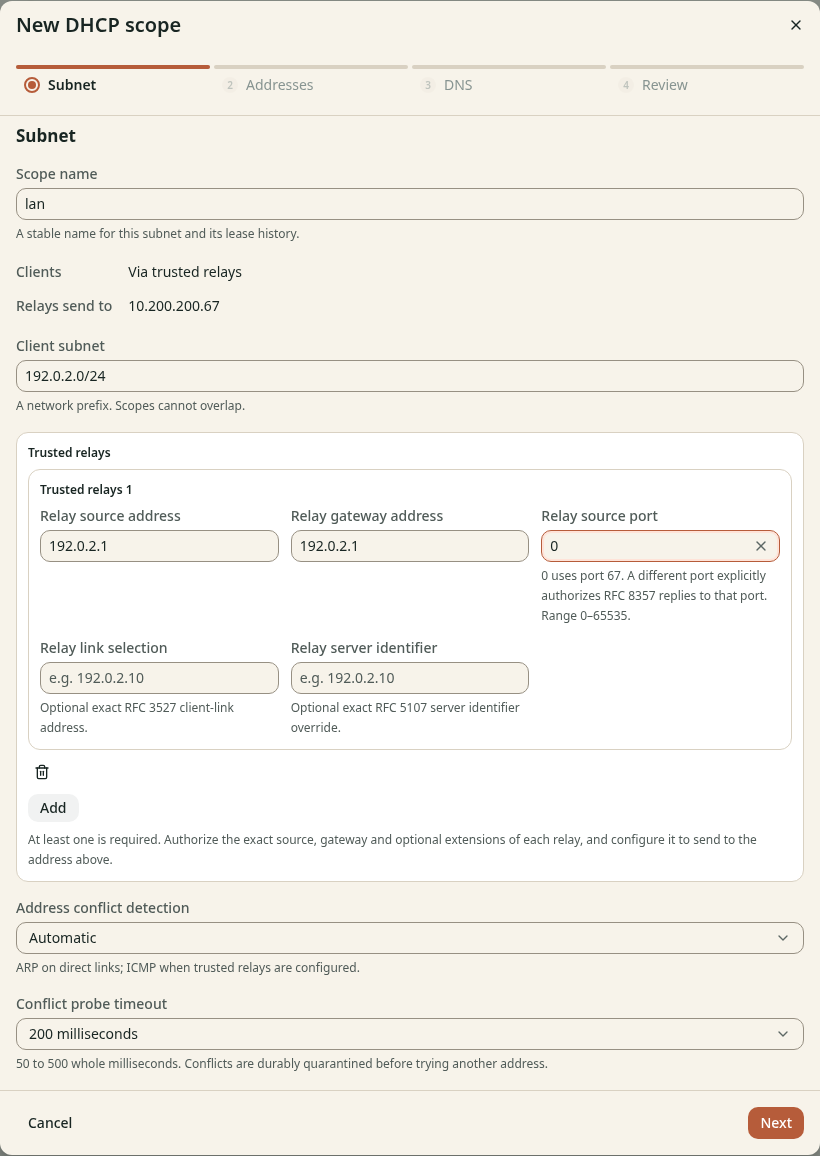
Figure 1. Kubernetes requires at least 1 exact trusted relay entry.
Leave the optional relay extensions empty unless the router sends them. Use the exact values from the router if it uses link selection or a server identifier override.
Each scope describes one client subnet. Repeat this walkthrough for other VLANs, with their own gateway and trusted relay entries.
Check the result
The source matches the router's forwarded packet address. The gateway matches
the client VLAN's giaddr. Neither field contains the LoadBalancer address.
Keep the wizard open and continue to Set the address pool.