
Review and save the Kubernetes scope
Before you start
- You need the open wizard after the DNS step.
- Keep the router relay disabled or block its traffic until the cutover.
CAUTION: Kubernetes scope changes apply live. Saving a valid scope can start DHCP immediately when the release has DHCP enabled.
Save the scope
- Click Next to open Review.
- Check the subnet, pool, gateway, DNS server and domain.
- Confirm that the summary lists the required trusted relay.
- Click Save scope.
- Open DNS > DHCP.
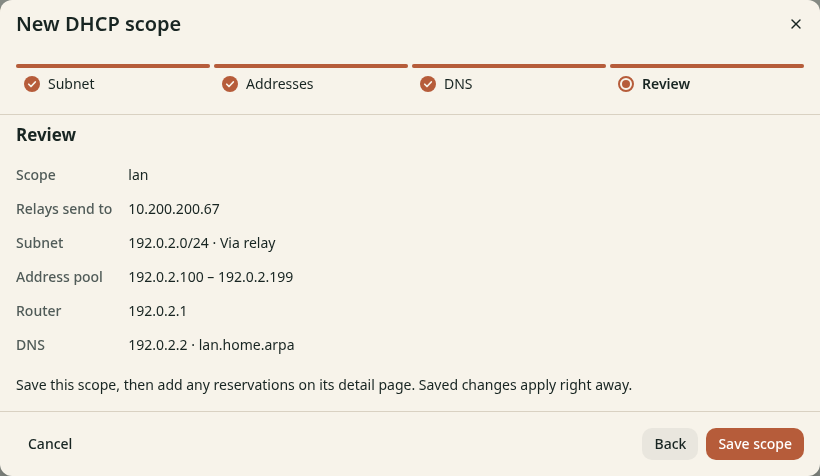
Figure 1. Check the trusted relay before the scope applies live.
The DHCP enabled switch is read-only. Helm controls this setting. Kubernetes elects 1 serving replica; scope edits do not need a node restart.
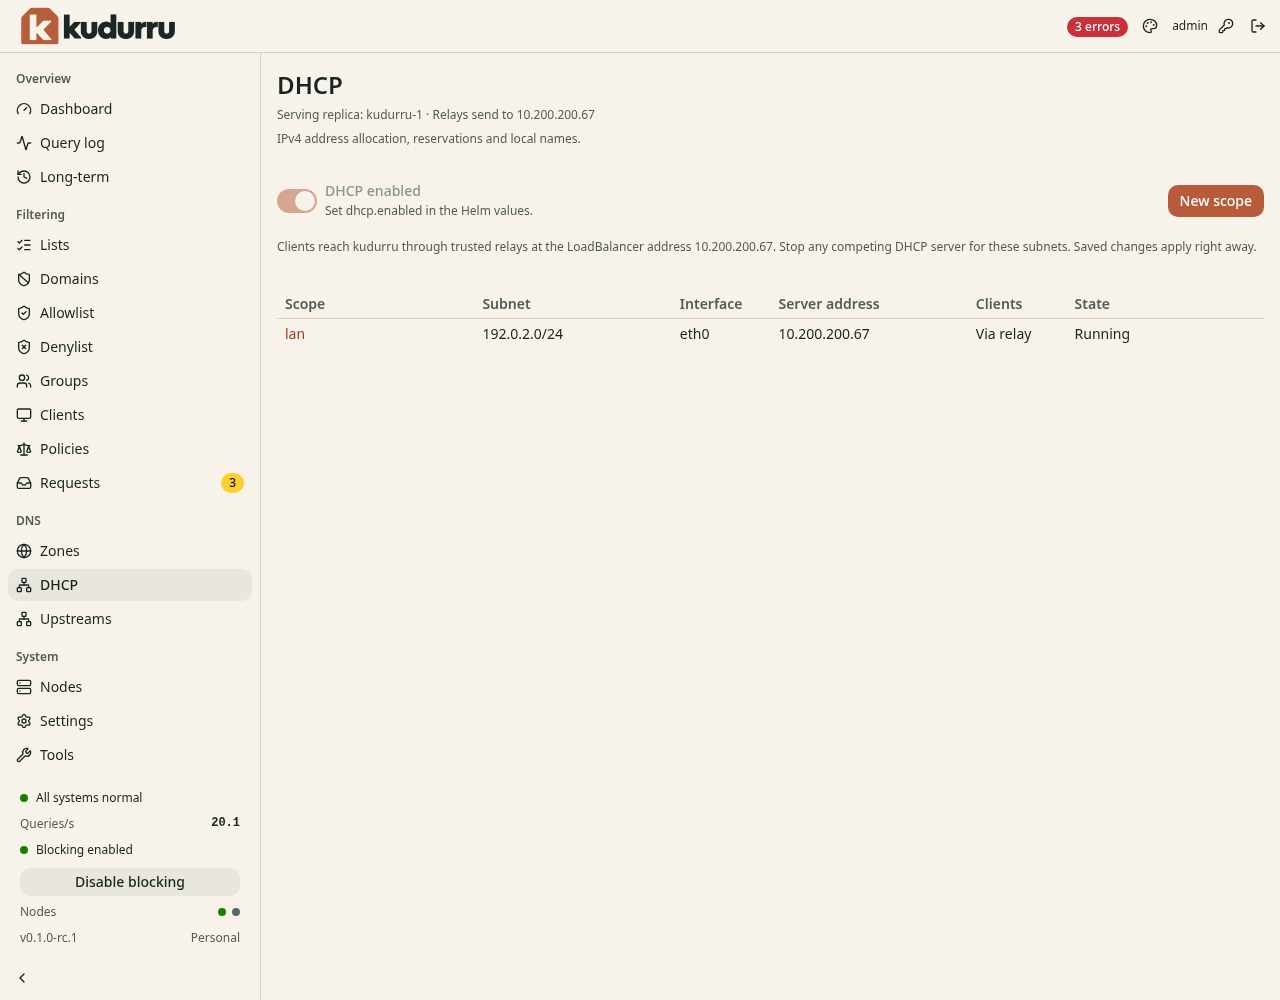
Figure 2. Helm enables DHCP and Kubernetes selects the serving replica.
Check the result
The scope appears on the DHCP page. Check its Kubernetes status:
kubectl get dhcpscopes
READY becomes True, and SERVING names the replica that handles DHCP.
Fix an unready scope before you forward client traffic.
Continue to Switch and test.