
Create a local DNS name
Before you start
- You need the
adminrole or permission to create and edit the zone. - You need a fixed address for the device, such as a DHCP reservation.
- You need a client that uses kudurru for DNS.
This example gives a device the name nas.home.arpa.
Use a separate domain from your automatic DHCP lease names.
1. Create the zone
- Open DNS > Zones.
- Click New zone.
- Select Primary on Type.
- Click Next.
- Enter
home.arpain Zone name on Apex. - Click Next.
- Keep the defaults on Records and access for this example.
- Click Next.
- Click Create zone on Review.
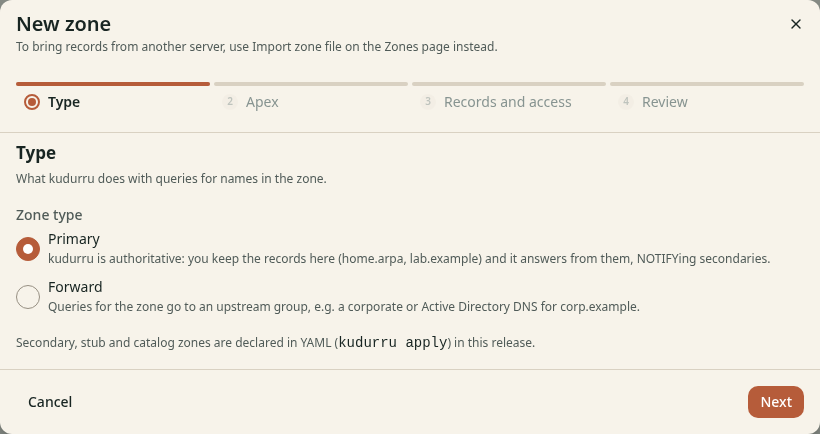
Figure 1. A primary zone holds the records you manage.
If a zone already covers this domain, open that zone instead. Do not create a zone over your DHCP domain unless you intend it to take precedence.
2. Add the device record
- Open the new zone.
- Click Add record.
- Enter
nasin Name. - Select A (IPv4 address) in Type.
- Keep TTL at Zone default.
- Enter the device's IPv4 address under Target 1.
- Click Add record.
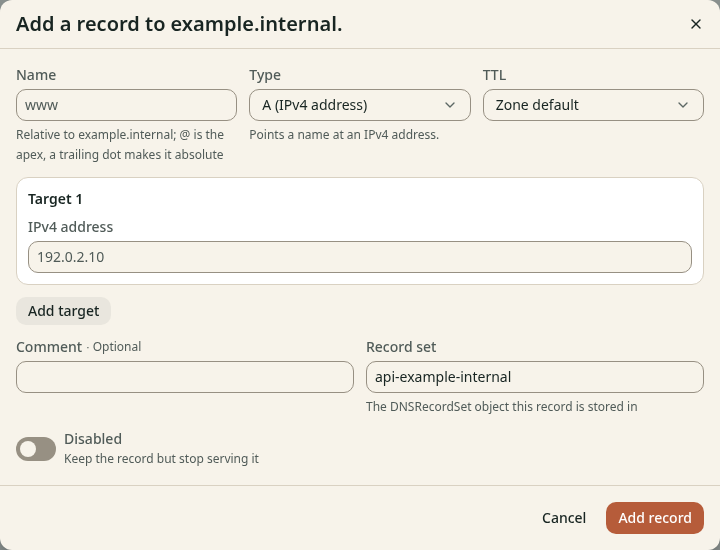
Figure 2. Enter a name relative to the zone and the device address.
The screenshot shows demo values. Use nas and your own device address for this example.
Check the result
Run nslookup nas.home.arpa from the client. The answer contains the address
you entered. The Query log details identify your zone as the source.
For other record types, access rules and imports, see Zones and upstreams.